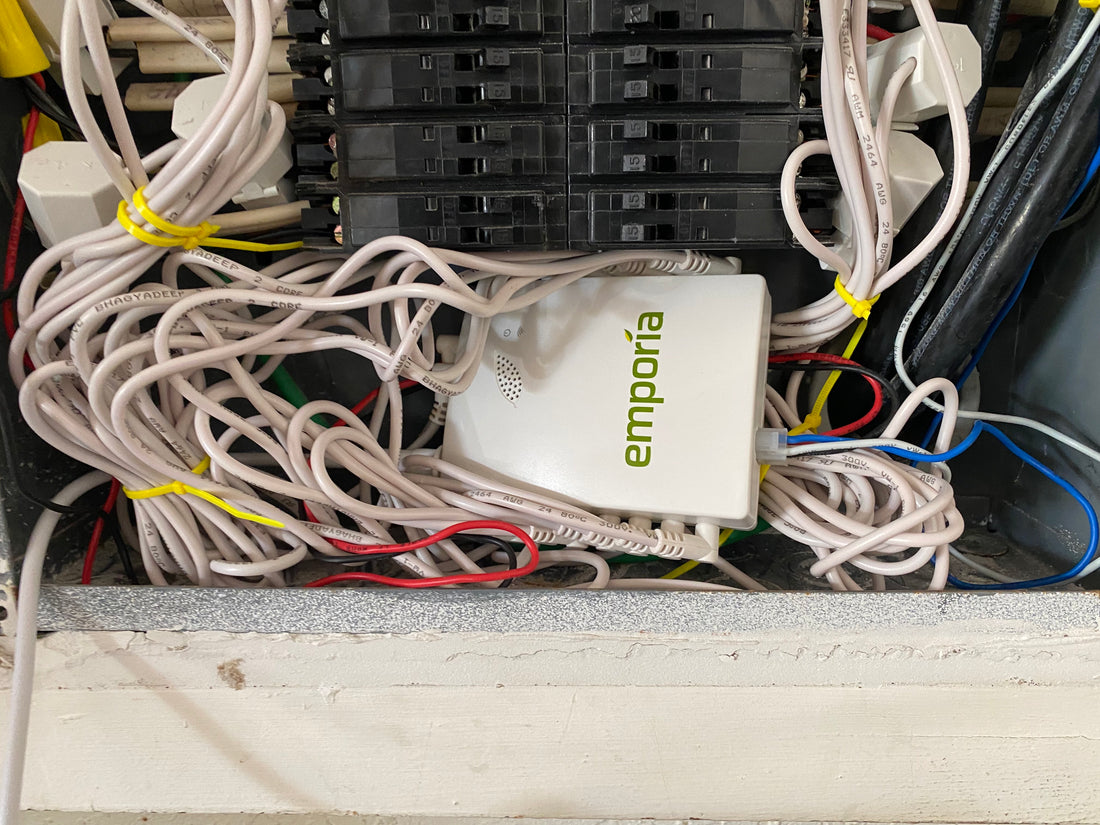
How to install an Emporia Vue Gen 2 energy monitor
Share
Installing an Emporia Vue Gen 2 energy monitor involves several steps, and it requires basic knowledge of electrical systems since you'll be working inside your home's electrical panel. (Video https://youtu.be/C1AbrOxS6Z8?si=THjhVYHgO5r8tGIR)
Here’s a step-by-step guide to help you install it:
Materials Needed:
- Emporia Vue Gen 2 energy monitor kit
- Smartphone or tablet with the Emporia app installed
- Wi-Fi connection
- Screwdriver
- Voltage tester / multimeter (optional but recommended)
- Zip ties
Step-by-Step Installation:
1. Preparation:
- Turn Off the Main Power: Before opening the electrical panel, turn off the main breaker to cut off power to the entire house. This is crucial for safety.
- Open the Electrical Panel: Use a screwdriver to remove the screws securing the electrical panel cover.
- Test for Voltage: If you have a voltage tester, use it to ensure that the panel is de-energized.
2. Mount the Emporia Vue Device:
- Choose a Location: The Emporia Vue should be mounted inside or outside the electrical panel, depending on space. Ensure it’s close enough to reach the main breaker wires and circuit breakers with the included clamps and sensors.
- Secure the Device: Use adhesive strips or screws to mount the device.
3. Connect the Current Sensors:
- Main Circuit Sensors: Attach the two large 200A current sensors (CT clamps) around the two main incoming power lines L1 & L2 (typically black or red wires) that connect to the main breaker. Ensure the clamps are fully closed.
- Circuit Sensors (Optional): If you're monitoring individual circuits, attach the smaller 50A current sensors to the wires of the circuits you wish to monitor. Ensure you connect them in the correct direction as indicated on the sensors.
4. Connect the Voltage Wires:
- Locate a Spare Breaker: Find two available breaker slots from L1 & L2 for the included breaker pigtails. These provide the voltage reference (max 240V) to the Emporia Vue device (make sure the two breakers are not connected to the same line).
- Connect the Pigtails: Attach the red and black wires from the Emporia Vue to the two breaker slots, and connect the white wire to the neutral bar.
5. Power Up and Test:
- Close the Panel: Replace the electrical panel cover and securely fasten it with screws.
- Restore Power: Turn the main breaker back on.
- Check LED Indicator: The Emporia Vue should power up. Check that the LED lights on the device indicate normal operation.
6. Set Up the Emporia App:
- Download the App: Ensure you have the Emporia Energy app installed on your smartphone or tablet.
- Create an Account: If you don’t already have an Emporia account, create one.
- Pair the Device: Follow the in-app instructions to connect the Emporia Vue to your Wi-Fi network. You’ll need to enter your Wi-Fi credentials.
- Configure Circuits: If you installed individual circuit sensors, assign them to the correct circuits in the app.
7. Monitor Your Energy Usage:
- Once everything is set up, you can start monitoring your energy usage in real time through the Emporia app. The app provides detailed insights into your home’s energy consumption, helping you identify energy-saving opportunities.
Safety Note:
- If you're not comfortable working inside an electrical panel, consider hiring a licensed electrician to install the Emporia Vue Gen 2 energy monitor. Working with electricity can be dangerous, and it’s essential to follow all safety precautions.
By following these steps, you should be able to successfully install and set up your Emporia Vue Gen 2 energy monitor to start tracking your home's energy usage.
Please refer to the Emporia installation manual before installation.
